Digital Photography & Imaging: Practical-Recoloring Black & White (WEEK 6)
31/10/2023 - (Week 6)
Aisya Diva Anwagodsa (0365505)
Digital Photography and Imaging / Bachelor of Design (Hons) in Creative Media
Digital Exercise 02: Practical-Recoloring Black & White
JUMPLINK
LECTURES
On week 5 the lecture is about Recoloring Black & White photos, Mr. Fauzi provided the materials and the lecture for us on google classroom. In these lectures, there are 2 ways to coloring black & white pictures, using brush or clipping mask. There are 2 photos for this exercise.
INSTRUCTION
PRACTICAL RECOLORING BLACK AND WHITE
Fig. 1.1 Turn B&W photo into COLOUR photo
(5/11/2023)
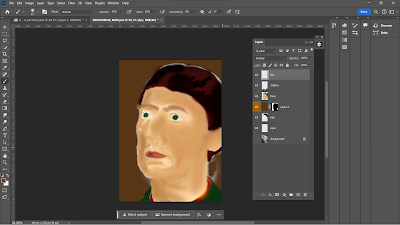
Fig. 1.2 Turn B&W photo into COLOUR photo process
(5/11/2023)
 |
| Fig. 1.3 Contour (5/11/2023) |
. Here are the main tools I used:
- Brush: For coloring the object.
- Overlay: To make the skin blend with the picture.
First Attempt:
 |
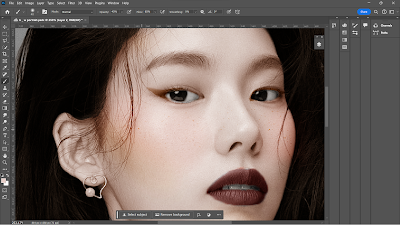
Fig. 1.4 Recoloring B&W photo Advanced level (5/11/2023) |
Fig. 1.5 Recoloring B&W photo
Advanced level Process
(5/11/2023)
- Eyedropper: To choosing color based on a picture/color palette.
- Brush: to create the color sample and coloring detailed parts.
- Quick Selection Tool: To refine the image.
- Solid Layer: To coloring the object.
In here, I feel like I did not like the result. So I decided to redo the second image, and combining both way of recoloring.
 |
| Fig. 1.7 Second attempt (13/11/2023) |
 |
| Fig. 1.8 Second attempt (13/11/2023) |
 |
| Fig. 1.9 Second attempt (13/11/2023) |
 |
| Fig. 1.10 Second attempt (13/11/2023) |
While from fig 1.9 to fig 1.10, I also use the same method with brush to create the leopard pattern on the clothes. I used two different shades of brown and black to create the pattern.
FINAL RESULT
REFLECTION
Experience:
I was enjoying doing this task, this reminds me of coloring when I was a kid, but this is way more advance. This taught me how to use layer mask, even though I'm a bit confuse with how it worked, but happy with my result.
Observation:
This particular task need a patient and detail, because we have to pay attention to some small part that we want to recolor. However, task does not as hard as it seems.
Findings:
In this task, we can express ourself and exploring color also fashion. We can do some modification to the object and make it looks stunning.
QUICK LINKS


.png)
Comments
Post a Comment